
6 SIMPLE STEPS TO PROPERLY ALIGN YOUR SKYTRAK
SIX STEPS TO PROPERLY ALIGN YOUR SKYTRAK
- Adjust the height of your unit so the bottom of the SkyTrak is even with the top of your hitting surface. The adjustable feet on the metal protective case make this easy... note that you can screw the feet in upside-down to get the unit lower, like when it's on the same surface as your ball.
- Zero-out the Tilt and Roll of your unit using the Level button from the SkyTrak app's home screen. You can use a bubble level on top of the unit to get it close, but use the Level feature to exactly zero-out both tilt and roll. Use the adjustable feet on the metal protective case to get it perfect. THIS IS CRITICAL to eliminate any left/right sidespin bias and get your launch angles to read accurately.
- DO NOT USE the "Alignment Mode" from the Level feature that turns on both laser dots... SkyTrak has publicly stated it is unreliable, and actually made that feature hard to find in the interface. (It's unreliable because the "dots" turn into short lines as they shine on the mat, any irregularity in the mat surface will change the position of the "dots", and the lasers themselves are not installed with tight enough tolerances to ensure their accuracy for this purpose.)
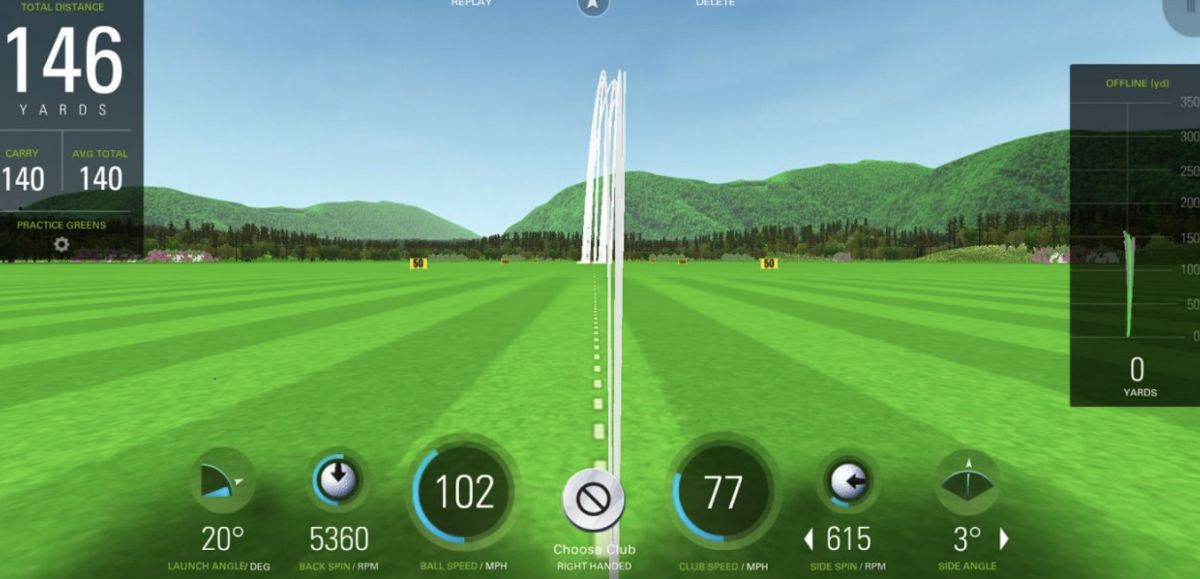
- Use a center-line target on your screen or net. Using the SkyTrak practice range is perfect for this, as you have a bright dotted white line in the center. If you're hitting off-center to your screen, adjust the center line under Settings > Session Settings > Camera > Offset to be perpendicular to your ball location (this requires the Game Improvement Plan subscription). If you're using a net, hang a string from the top of the net, weighted at the bottom with a small metal washer, and make sure the string is hanging at a position perpendicular to your ball position. MAKE SURE YOUR BALL POSITION (the red dot) IS SQUARE (PERPENDICULAR) TO THE CENTER-LINE TARGET ON THE SCREEN. Use a tape measure, laser, or other long, straight line to verify that a line between the red dot and the center line on the screen or net is a perfect right angle to the screen.
- Make short chips with a 7 or 8-iron at the center line target, and watch where the ball hits. When the ball hits within an inch or so of your center line, SkyTrak should read 0 degrees side angle (the number at the lower right of the practice range). If you hit the center line, but SkyTrak reads a number to the right, it means SkyTrak thought that shot went right, so turn the unit slightly to the right (clockwise if you're looking down on it) and repeat this step. Always turn the unit in the direction of the incorrect reading. Once you get the hang of this step, it should take you no longer than a minute or so to get it perfect, and you only need to do it once assuming your don't move your unit again. Your unit may need to be turned up to 5 degrees or so right or left in order to read straight shots as straight. HANDY SHORTCUT: if you're about 9 feet from screen to ball, you can assume that the horizontal launch angle of the shot in degrees is about half the distance in inches from center line contact. For example, if your ball hits about 4" to the left of center line, SkyTrak should read that as 2 deg left. While you're practicing, take note of where each ball hits the screen or net to spot-check any discrepancies and notice when it may be out of alignment.
- Finally, mark the position of the SkyTrak with Sharpie lines or tape so you can quickly reposition it in the future. If you have the metal protective case, you can also put an alignment rod in the front groove, and make a note of where on the screen that rod points, in relation to the center line target.

DID THIS ARTICLE HELP YOU?
If so, please take a moment to show your appreciation by leaving a quick 5-star rating and review (optional) for us on Google Reviews: Yes, I'll do that!

Ron Hornbaker, Founder & CEO
If you haven't yet purchased a launch monitor, or have questions with anything golf sim-related, text us at 512-222-2220 or email hello@gunghogolf.com with questions.
We know the golf sim market can be overwhelming to newcomers. We can work with any budget, and our goal is to get you set up with the best possible equipment and software at the lowest possible price. We love to talk about golf sims, and love helping folks out however we can!
Read more
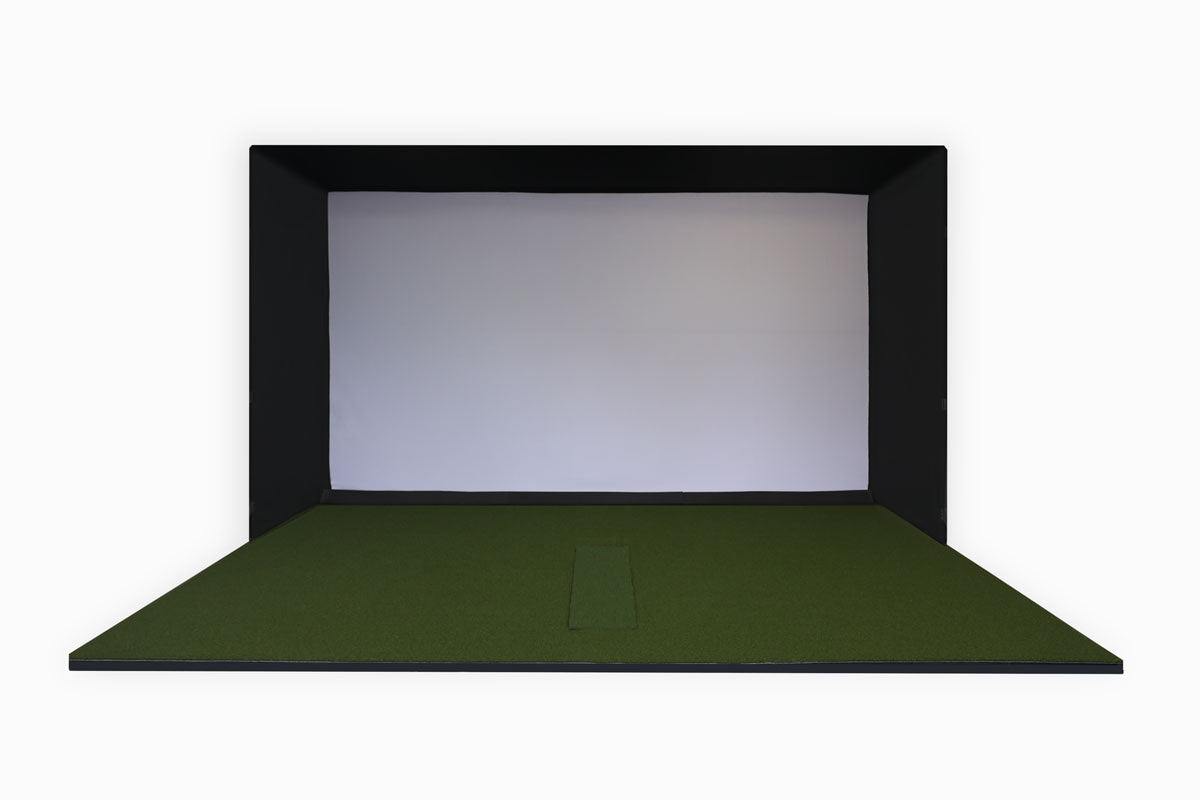
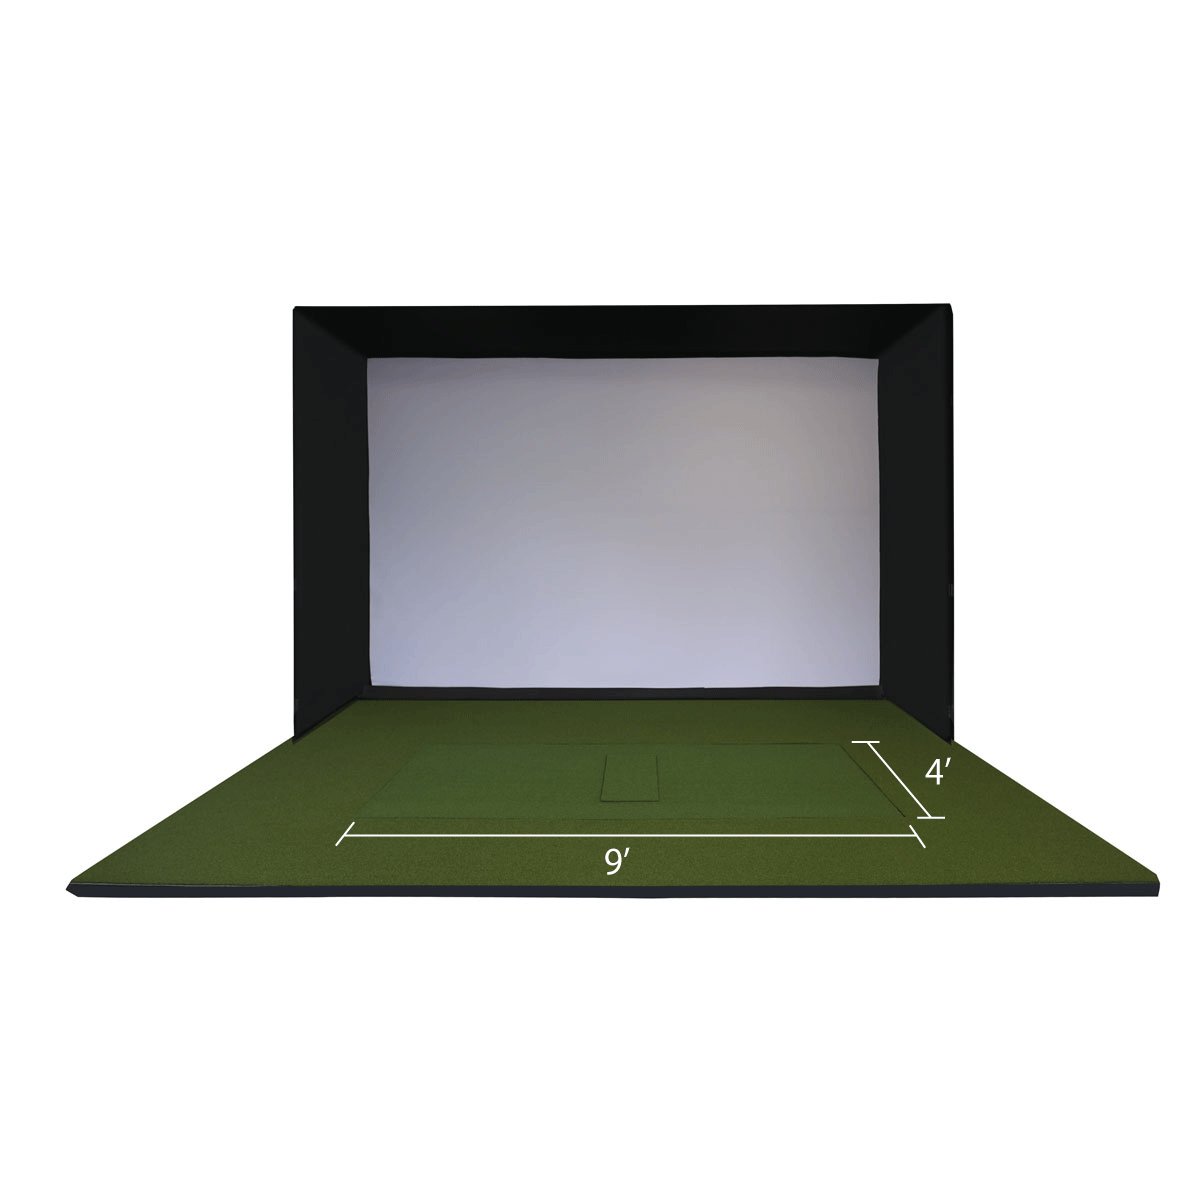
HOW TO BUILD YOUR OWN DIY IMPACT SCREEN ENCLOSURE FOR YOUR GOLF SIMULATOR STUDIO
Buy our Enclosure Kit HERE. Email hello@gunghogolf.com for 20% off our Enclosure Kit! Installation is a lot easier, takes 30 minutes or less Everything you need arrives with 1-2 weeks 1 Year W...
Read more
FIX STUTTERING GRAPHICS IN E6 CONNECT
E6 Connect for PC, the golf sim software by TruGolf, doesn't always use your gaming PC's Nvidia GPU by default, which can lead to jerky, stuttering graphics. This short video shows you how to impr...
Read more
