Buy our Enclosure Kit HERE.
Email hello@gunghogolf.com for 20% off our Enclosure Kit!
- Installation is a lot easier, takes 30 minutes or less
- Everything you need arrives with 1-2 weeks
- 1 Year Warranty on all parts
- Unlimited free support on designing your sim room
- Much higher quality look, with a longer lasting design
- Much easier to replace screen in future
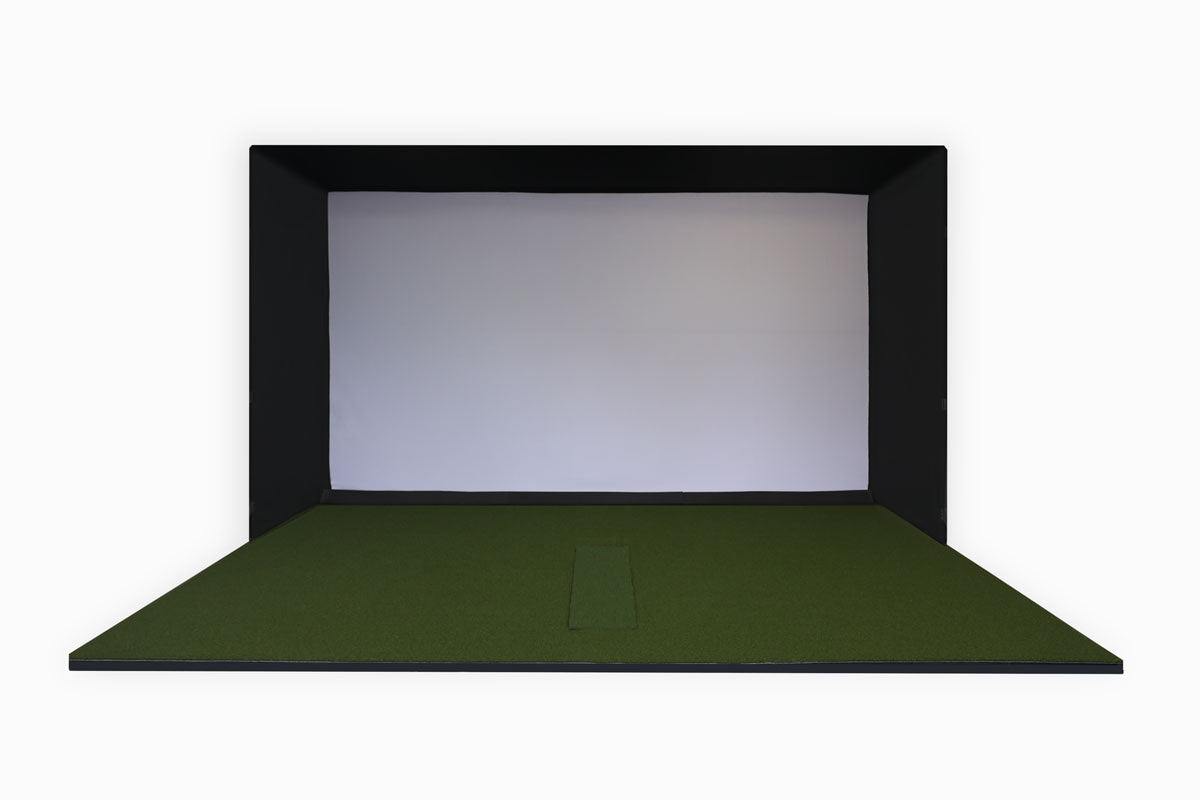
It's easy and economical to build your own impact screen enclosure for your home golf simulator studio! Here's a helpful guide, along with links to the parts you'll need. Total cost for a 16'x9'x3.5' enclosure should be around $1,060, including all the materials and a
top-quality screen.
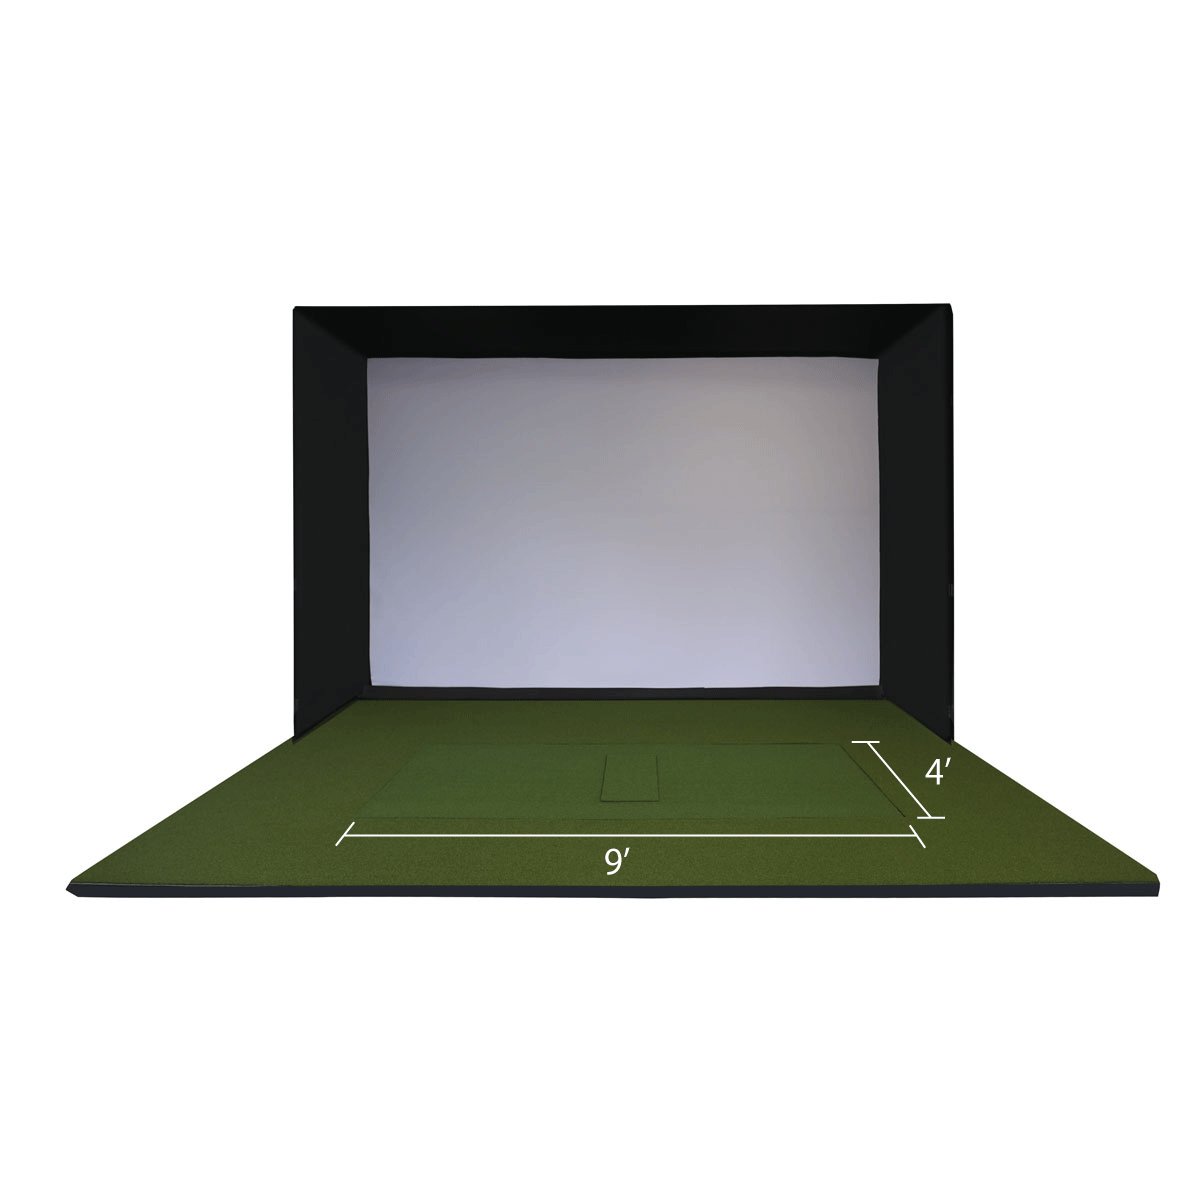
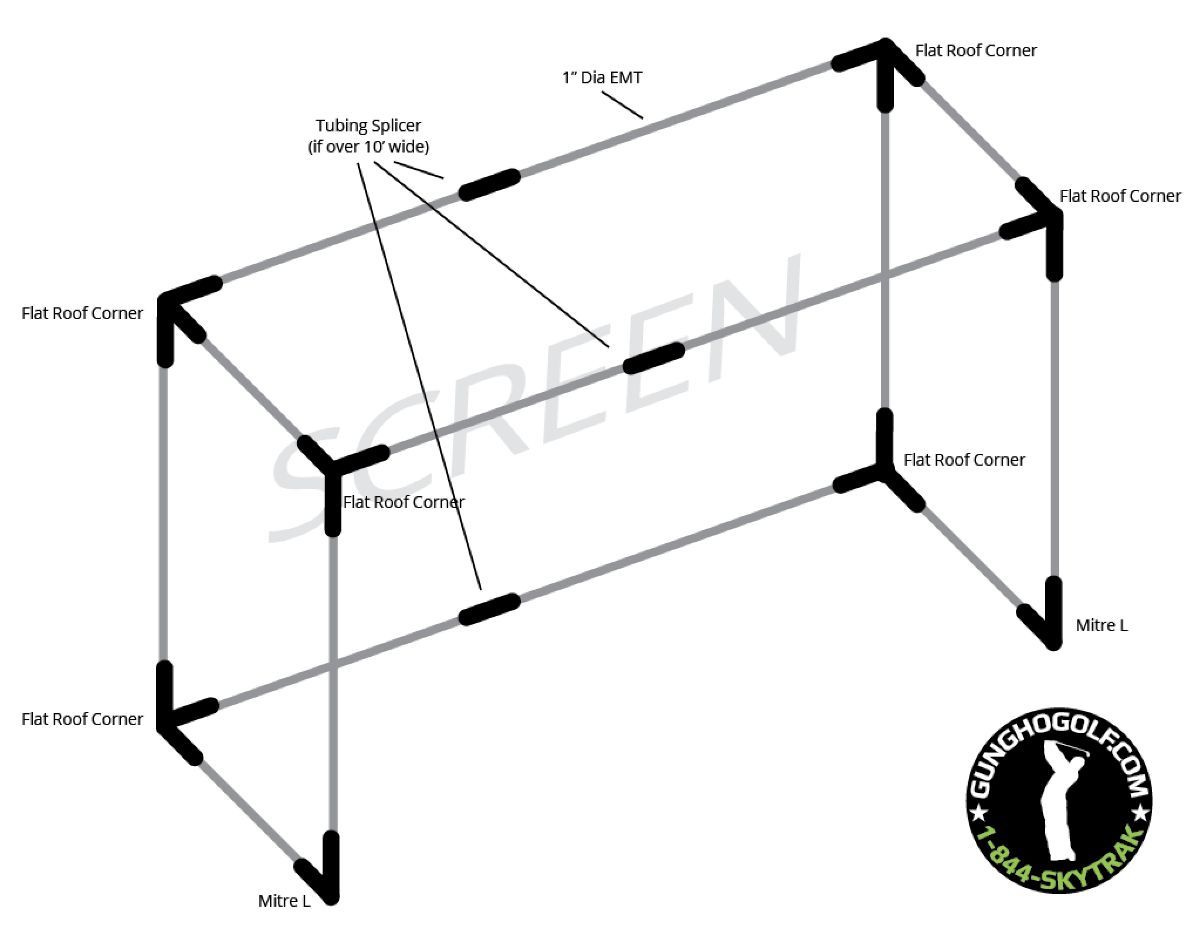
Enclosure Diagram
Parts You'll Need
Let's assume you're going to build a 16' wide by 9' tall by 3.5' deep enclosure (perfect HD dimensions with a 16:9 aspect ratio). Here are the parts you'll need:
-
1" EMT (Electrical Metallic Tube) conduit (Home Depot link) - 11 of the 10' long pipes - about $210
-
Pipe cutter (Amazon link - about $13) or a Sawzall with metal blade (faster)
-
Connector fittings from A1tarps.com - Flat Roof Corner X 6, Mitre L X 2, and Tubing Splicer X 3 (only needed if you're going wider than 10') - about $65 plus shipping
-
Foam Pipe Insulation (Home Depot link) - 18 of the 6' pieces - about $50
Assembly
Cutting the pipe is easy with the hand-powered pipe cutter linked above. Cut all pipes to their proper length (add about 8" of width to accommodate a 4" screen gap on either side - more on that below), then fit them in the connectors loosely before squaring it all up, then tighten down the included connector screws. When going wider than the 10', it's best to have the splicer joint on the long spans to the side to minimize sag (e.g., for a 16' wide enclosure, use a full 10' long pipe spliced to a 6' pipe on the top 2 and bottom runs).
Attaching the Screen
Buy raw impact screen material here in our online store. For the width of the screen, you'll want it 6" shorter than the INSIDE width of your enclosure, leaving 3" gaps on each side. The height of our screen will always be 10', so as long as you don't go higher than 9'6" on the INSIDE height of your enclosure, you'll be good to go.
To attach the screen to your frame, our favorite method is a combination of tarp clips, ball bungees, and tube clips. The key is to get good tension on the sides, just enough to remove wrinkles but no so much that you get a lot of ball bounce-back. You'll want to cut or fold your screen material so you're leaving about a 2-3" gap on each side, to give the bungees some room to provide tension. (To keep your perfect 16:9 aspect ratio, you might consider reducing the height of your enclosure by about 4-6", or making it 16'6" wide to start with, since your screen won't have gaps on the top and bottom.)
-
32mm Tube Clips (Amazon link), which you will use every 3 feet or so on the top and bottom of the screen - 20 (2 packs of 10) clips - about $18. Space them closer near the center of the screen, especially on the bottom tube, where they tend to slip a little with driver shots
-
Tarp Clips (Amazon link), which you will use about every 2 feet or so on the sides of the screen - 12 clips - about $15
-
6" Ball Bungees (Amazon link), which you will wrap around the side pipes and attach to the tarp clips - about $8
Start from the top left or right corner of the screen, wrapping the screen over the top bar and securing it with a tube clip, then work across to the opposite top corner, using a clip every 3 feet or so. Then, secure the sides with 5 or 6 tarp clips and bungees on each side. Finally wrap the screen under the bottom bar, and from behind, secure it every 3 feet or so with the tube clips. Near the center of the screen, add a few extra clips at the bottom to prevent slipping.
If you find that the screen slips (loosens) in the center from the top and/or bottom tubes, it's probably because the tube clips you got are a little too loose, or you don't have enough of them in the middle section of the screen. You have a few options in this case:
- Replace them with tighter clips (unfortunately, with Chinese parts like these, it's hard to know how tight they are until you receive them)
- Line the clips with 3-4 layers of duct tape, effectively making them tighter and adding friction
- Use more clips on the bottom center area, say one clip every 9" or so
- Last resort, but sure-fire method: use tarp clips on bottom and top edges of the screen, behind the screen, connecting the top and bottom of the screen together with vertical long bungees or nylon cord tied tight. Doing this in the middle 4 feet with 3-4 vertical spans should be plenty, and will absolutely hold the screen securely.
Here is how the sides of the screen are attached to the side tubes using Tarp Clips and Ball Bungees:

Covering the Sides and Top of the Enclosure
While you can use any sort of netting on the top and sides, what usually looks the best and helps image quality by blocking light is some sort of heavy, black, light-proof cloth. We like
Black Commando Cloth from ChicagoCanvas.com, as it comes in 4'6" wide rolls by whatever length you need. For a 16'x9' enclosure that's 3'6" deep, you'll need just over 34', so you'll want to buy 12 yards (about $179 + shipping).
To attach the black cloth, start from the outside bottom of one side using tube clips to secure it, then wrap it up the side, over the top, and down the other side, using tube clips every 5 feet or so. Cover the 3" gaps on each side of the screen by wrapping the black cloth around the back on the sides, and secure it in the same clips you used to hold the sides of the impact screen.
Final Touches
Once you've got the screen attached and tensioned properly, and the cloth attached to the sides and top, cover all sections of the pipe with the foam pipe insulation to prevent hard bounces should your ball hit a pipe.
You may find that in a 14' wide or wider enclosure, the top rear bar droops a little in the middle under the weight of the screen, in which case you may want to either a) affix a wire or paracord to it going up to an eye bolt in the ceiling or rear wall, or b) insert a 3' X 7/8" wooden dowel into each end of the tubing to keep the joint stiffer.
If you have raised your flooring using Foamular 150 or exercise pads, it's best to position the bottom pipe behind the raised flooring to avoid ball strikes on that bottom pipe, and also cut the raised flooring to accommodate the side pipes so the enclosure sits level. Note: Foamular 150 under turf works great, EXCEPT in the stance area, where it will dent over time (especially under the lead foot). So, in a 4x4' section under the stance area, it's best to use 1" thick EVA foam exercise mats like
these on Amazon.
Make sure your screen is at least 12" away from any wall or object behind it, as a well-struck ball will typically make it flex back about 8-9".
OPTIONAL: To extend the life of your screen, consider getting some 1" white nylon sport netting from eBay and hanging it behind the screen, right up against it, to help absorb impact. Do NOT use black netting, as the dye may bleed through onto the screen. No need to go full-width with this netting, it's only important in your center 3-4' contact area up to 7' or so where most high-velocity hits will be. To further deaden impact and sound, you can hang a moving blanket or memory foam mattress pad behind the center contact area.
We hope this helps you with your DIY enclosure project! Please give us feedback if any of our links are out of date or prices change.
Email hello@gunghogolf.com for 15% off our Advanced DIY Enclosure! (Starting at $1,615 with discount)
- Installation takes 45 minutes or less
- Everything you need arrives with 1-2 weeks
- 1 Year Warranty on all parts
- Unlimited free support on designing your sim room
- Much higher quality look, with a longer lasting design
Buy our Advanced DIY Enclosure Kit HERE.